Hi all
I'm still recoverng from the flu. I have a nasty cough now, and am still lacking energy. But I do have a card to show today. And I am quite proud of this one even though I say it myself.

This is one of my special family cards for this year. I love it because it makes a real statement. It's more than just a card. It's full of sparkle, glamour and dimension. The image is from Penny Black, which I actually bought last Christmas. See I don't just buy new stamps, I do use my old ones occasionally too. It was coloured using Zig Art pens, and the dress, hat and boots were glitted with crystal glitter. I added some applique paint to the 'furry' bits on the hats, dress and boots and puffed it up with my heat gun.

The snowflakes were cut with Cuttlebug dies. The large snowflake was dabbed with blue brilliance ink in the middle and the points for variation, and to tie in with the blue colour scheme. I then covered it with Glossy Accents, and sprinkled crystal glitter on to it and left to dry. Doing it this way means that you get a rather sturdy snowflake instead of a flimsy one, as the Glossy Accents set hard. I added a bright blue gem to the centre, bling bling.

In this picture you can see how the card is folded. In half and then the top half folded back on itself. The matted image was stuck half over the fold. The scrolled silver and white paper was stuck onto what is really the inside of the card.

The Christmas tree was made using a template. I used a ready bought one, but you could make your own, it's an easy shape to draw. I used two shades of Bazzil and cut out three tree shapes from each shade. I scored each one in half, then stamped and embossed showflakes onto each tree shape. I added some silver sequins to some of the snowflakes.
To assemble the tree, just adhere back to back on one half only. The unstuck side will stick to one half of the next tree and so on. Just keep adding the trees until the are all joined together. Stick one side of the tree to the card, and open up. It may sound complicated, but once you get going you will see it all coming together for youself. It's actually very easy. Thought I should have done step by step photo's to help you.
If you leave the side of the last tree free, you will be able to close it up, and fit into a shallow box, and the receipent can open the tree up themselves. Imagine their delight, and surprise. You could really go to town on these little trees, making them as table decorations, or for the mantlepiece. They are so cute. Let me know if you decide to make one, and I'll pop on over to your blog and take a look.
I'd be happy to hear your comment's if you have the time to leave any. Thank you for visiting.
Happy Crafting.

.


 I made some more hearts using Glossy Accents as in my last project, but this time I sprinkled a little crystal glitter onto them and left to set. The glitter just catches the light and reminds me of a glint of sunlight, you can't see it too well on the photo though.


 I decorated both sides, to make the most of the space. The photo's Jess gave to me were old one's which I had to copy. After changing them to black and white in Photoshop, and cropping them a little, I printed them out. I would normally print them on to photo quality paper, but they did not print well onto this, so I opted for good quality heavy weight copy paper, which the image looked better on strangely enough.
  I used a lacing technique, where I tore a 'v' shaped section out of the top patterned layer of paper. The edges of the paper were then inked with a versacolour ink pad and holes were punched in each side of the tear, through which I laced embroidery thread. I then embossed a piece of plain paper with a Cuttlebug embossing folder, and slipped it behind the missing section to give a two layer effect.


 Now
Now 


 I stamped bear paw prints around on one side of a 6" square card. The image was coloured with Copic markers, (I'm hooked on these). I used my nestabilities to cut it out. Then matted it on a larger circle of blue Bazzill. I added some blue and white gingham paper, which I sponged around the edge with blue Brilliance ink, and drew on faux zig zag stitching with a Sakura pen. I like the effect. Some Prima flowers and a few tiny buttons finished it off.
 I decorated the inside of this card. I think it looks lovely, and what a surprise when you open it to have the inside looking as good as the outside. Of course it does take more time and materials, but for special cards it's well worth it. I'm very happy with how this card turned out.


 The image was coloured with Copic's, with a touch of glitter on the hat, and little glossy accents on the musical notes, to add dimension.
 I adore this card, and I would love to receive one like it from one of my friends. This makes it all the much harder to part with.
 I don't have much to say abut this card, I'm just doing a quick post before I cook dinner. I'm settling down later to watch the tv, with a bottle of wine.
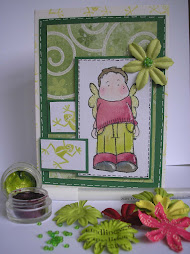
 The image was coloured with Copic markers. The papers are from Imaginescence, and the flowers from Prima. Do you like the little easel I found in my local art shop. I thought it would make it easier to get better photos.


